Review and shortlist
- Review candidates and shortlist or reject them before interview
- Create "candidate pack" to forward applications / information to panel members by email (can be used for reviewing, shortlisting or interview preparation)
- Familiarise yourself with the University’s Records Retention Schedule for guidance on how long to keep recruitment-related documentation.
Review and shortlist / reject candidates
Taking agency applications
Agencies that have signed our preferred supplier agreement will be given access to relevant vacancies, as agreed with the recruiting manager. The agency can submit applications on behalf of the candidates and the recruiting manager can identify the agency candidates and which agency they are from.
1. After the vacancy closes
- You will receive an email notification advising you when a vacancy goes live, and candidates can begin to apply for it.
- When the vacancy has closed, the Recruitment Team will change the job status to Considering and will check the candidate applications for redeployee and disability confidence.
- Once completed the Recruitment team will change the candidate statuses to Recruitment Manager Informed.
- When the Recruitment Team have done this, they will email you and advise if any of the candidates are redeployees or disability confident and advise that you can now commence viewing the applications and shortlisting.
- The Recruitment Team are responsible for adding all relevant panel members to the job.
2. Reviewing candidates
- Login to Jobtrain – we recommend you use Chrome as your browser of choice.
- You will see a list of all your jobs that are at Considering status and ready for you to start reviewing the candidates. The system automatically lists 20 jobs, but you can show up to 100 if you wish.
- Click on the Job you are ready to shortlist to see the list of candidates that have applied for the role.
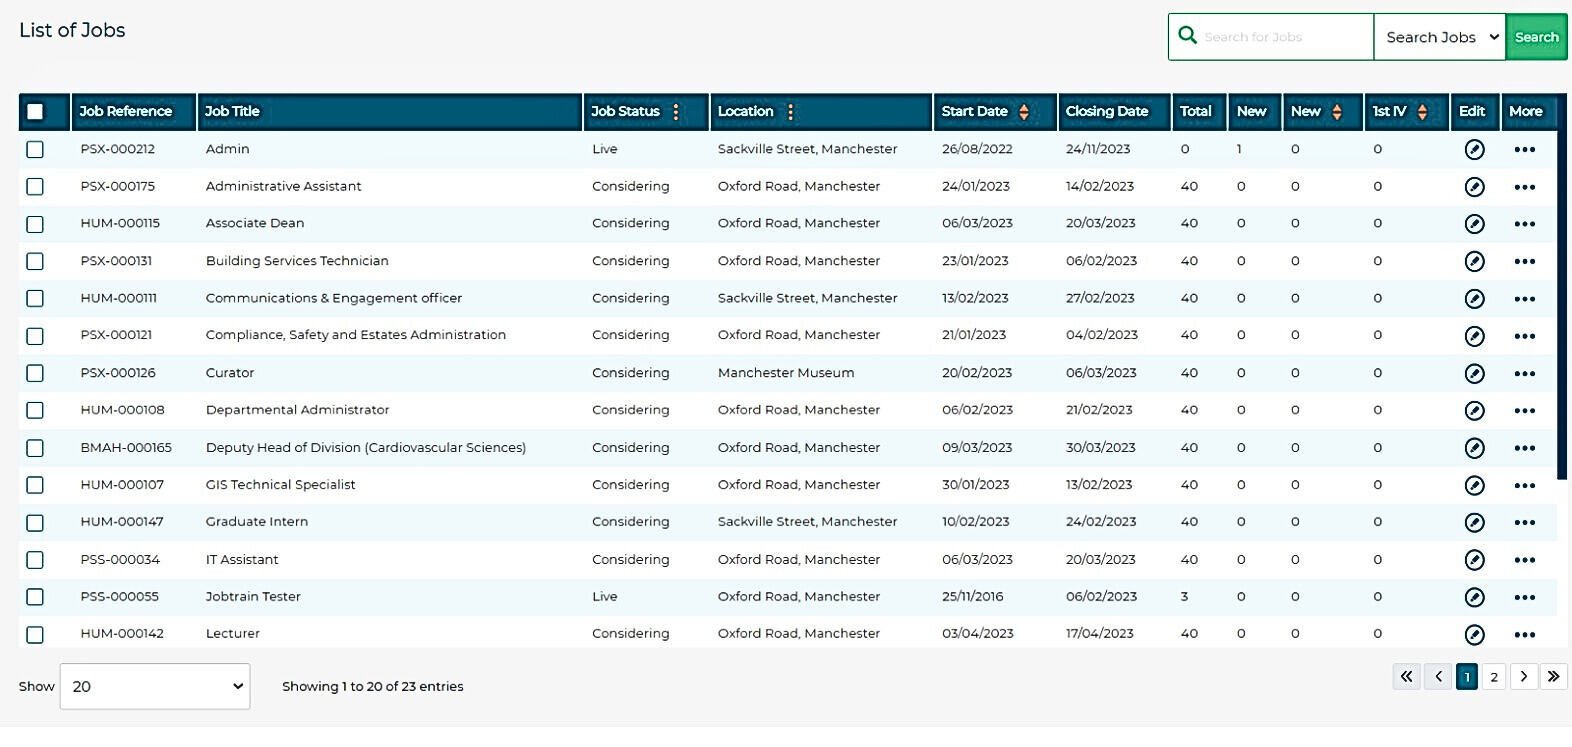
3. Candidate list
- On your list of candidates, you have several columns. Depending on the type of application form used there are two different ways you could see the list, with Edit, or with 1st and 2nd indicating two application forms attached to the vacancy. This applies for non-internal-only posts.


4. Candidate
- Candidate: The name of the candidate. There may be several different icons against candidates, see Appendix A for further information on what they mean.
- Status: The application status that the candidate is currently at. At this stage this should always be Recruitment Manager informed.
- 1st: Indicates the candidate has completed the first stage application form.
- 2nd: Indicates the candidate has completed the 2nd stage application form which is a personal details form only released to successful external candidates to request further details in order to process the offer.
- Interview: This column is where you can book an interview on behalf of the candidate and also view the booked interview date/time against each candidate.
5. Viewing applications
- You will see a list of all the candidates that have applied for the role.
- Click on the candidate's name to review their application. From there, you’ll be able to view the different sections of the application ready for shortlisting.
- You can navigate between each candidate. To review the next application: 1) Go back to the candidate list by clicking the back button on the lefthand side and click the next candidate’s name in the list oronce in a candidate record, or 2) Click the green arrows to the left or right of the candidate key information section to move to the next candidate.
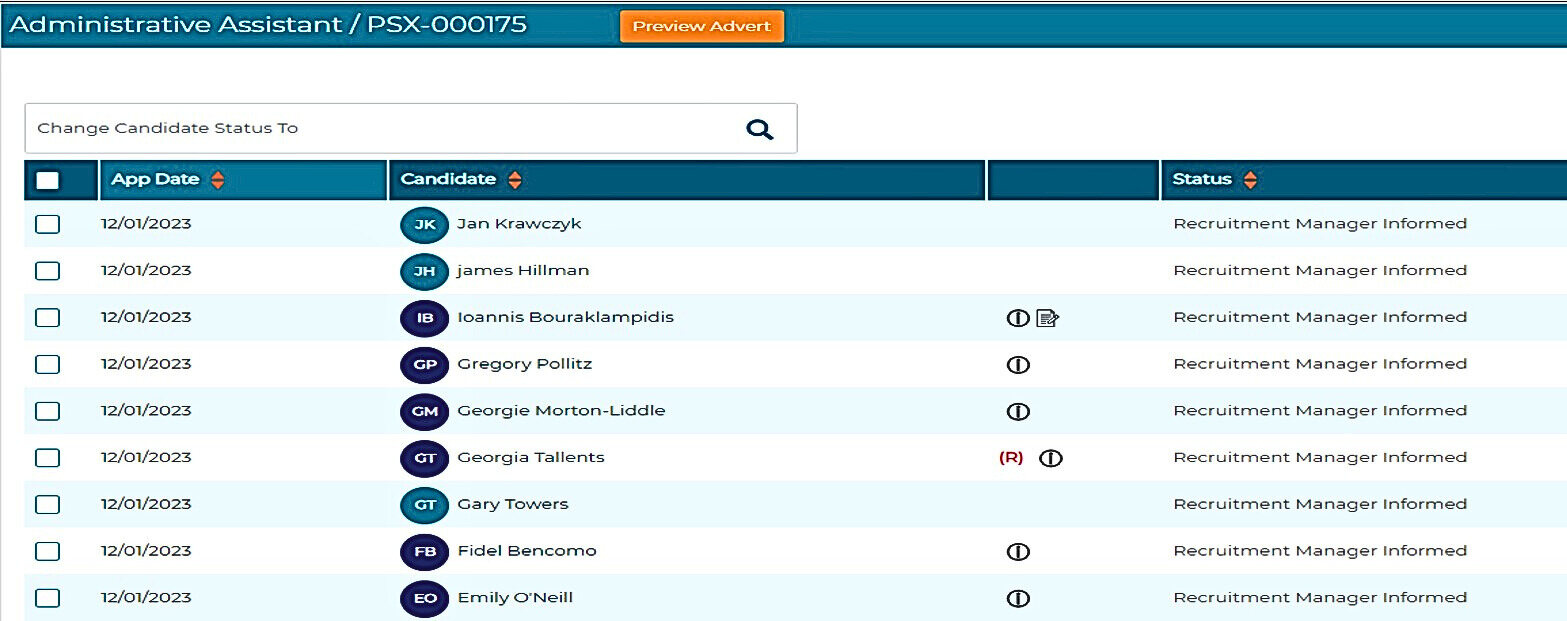

6. Shortlisting a candidate
Assess applications and choose shortlisted candidates outside of Jobtrain, as explained in the recruitment step-by-step guides.
7. Changing a candidate's status
You can use the On Hold status before shortlisting, but please update it as soon as possible so the candidate knows where they are in the recruitment process
Once shortlisted, and verbal feedback has been given where required, the candidate status should be changed to either:
- Reject after application (no email as verbal feedback given) for internal candidates including redeployee. We recommend this status is only updated once they have received their feedback.
- Reject after application (+sends automatic email) for external candidates
- Agency Candidate reject after application (no email as agency informed)
- Agency Candidate reject after application (+sends automatic email) Only use if you have not notified the agency directly
- Shortlisted
There are two ways to change a candidate's status, you can change from the Candidate Listing page where you can change multiple candidates in one go (see the Successful Candidate accordion for information on selecting multiple candidates). Otherwise, you can change from the Candidates Record selecting individual candidates.
8. Filtering
- Click Search/Filter to filter any status in the list of candidates.
Top tip: You can add a filter to show only those candidates who have the same status.
- In the Application Status field using the drop-down menu, change to the status you want to see and press Search. The Candidate List will now only show those who have the status you have requested.
- To clear a filter, click Clear all to see the full list of candidates.


9. Reject after application: From the Candidate Listing page
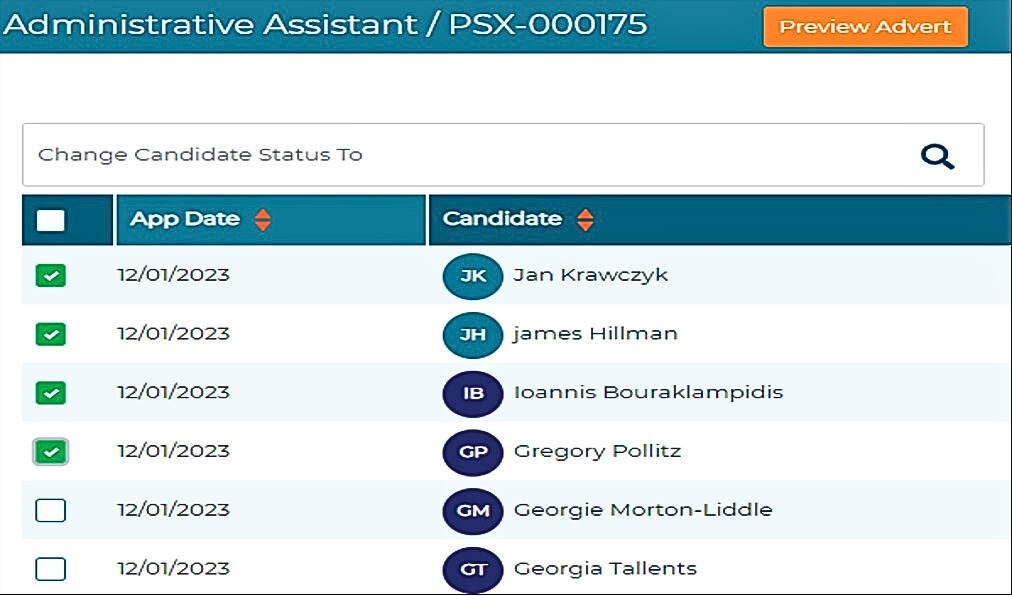
Tick the box next to the candidate(s) and click into the box Change Candidate Status to select the required status from the list. Select the status from the drop-down menu:
- Reject after application (no email as verbal feedback given) we recommend this status is used for internal candidates and only updated once they have received their feedback.
- Reject after application (sends automatic email), for external candidates.
- Agency Candidate reject after application (no email as agency informed), this is for candidates submitted via an agency.
- Agency Candidate reject after application (+sends automatic email) Only use if you have not notified the agency directly
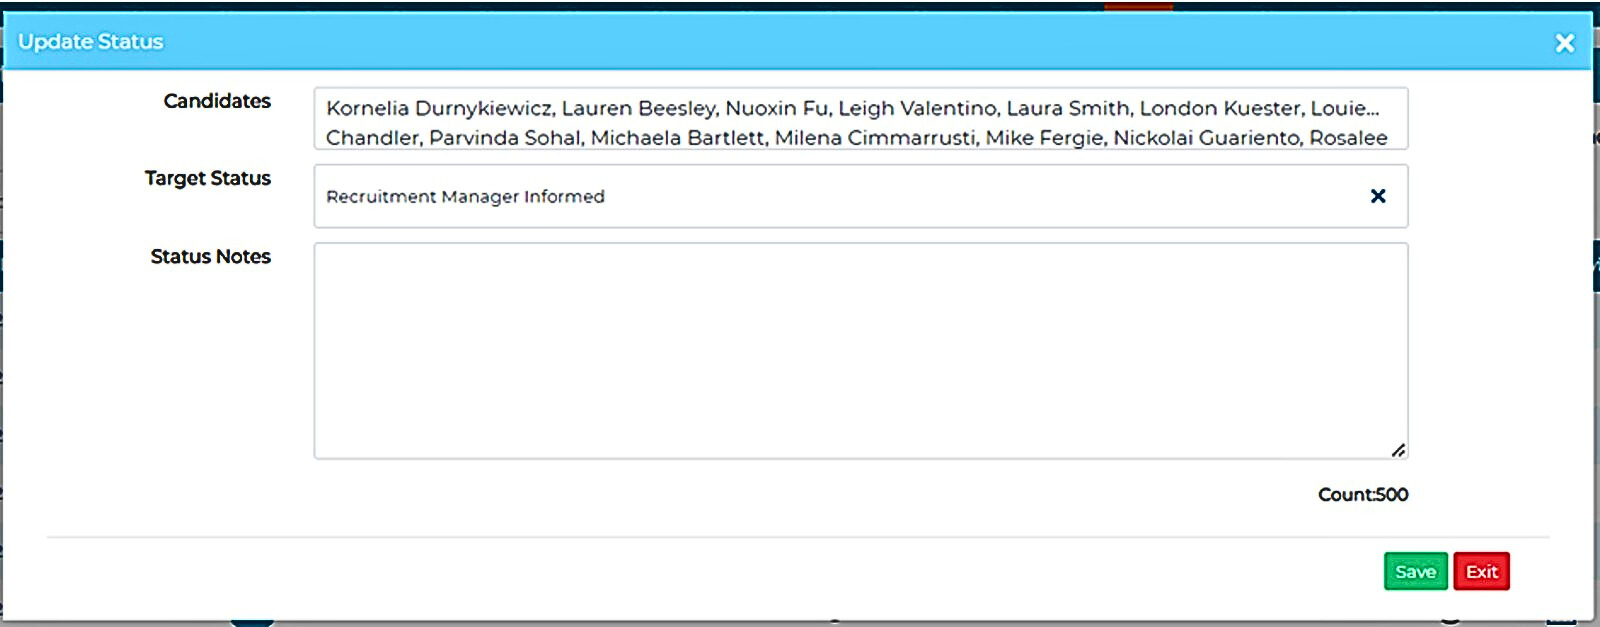
Once selected the Update Status box will appear.
- For the status Reject after application (no email as verbal feedback given), which is for internal candidates, we recommend this status is only updated once they have received their feedback. Press Save.
- For the status Reject after application (sends automatic email) (External candidates) Or Agency Candidate reject after application (+sends automatic email) press Next. You will now see a preview of the email that will be sent to the unsuccessful candidate(s) and you can make any amendments to the email at this stage if required. Press Save when these have been made.
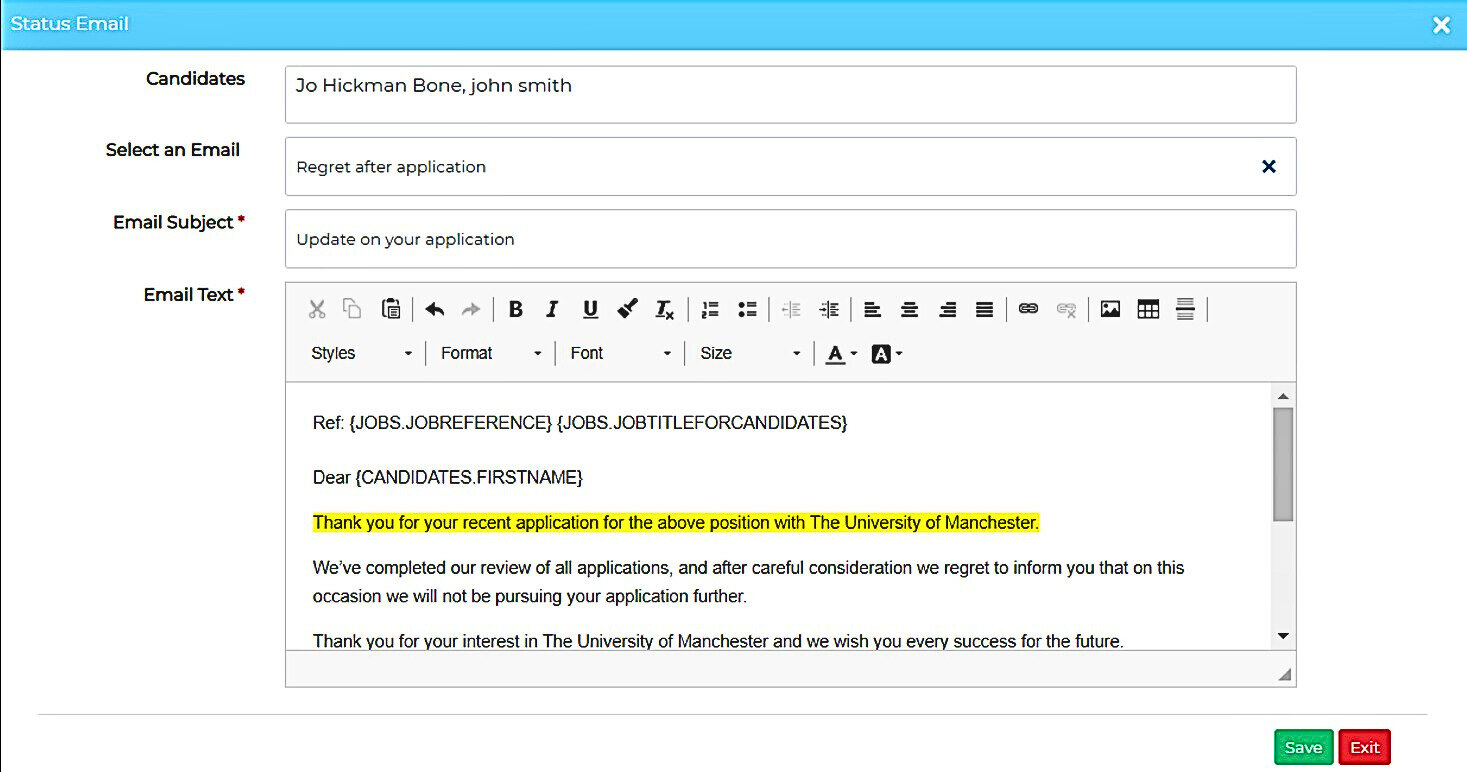
For the status Agency candidate reject after application (no email as agency informed), click Save.
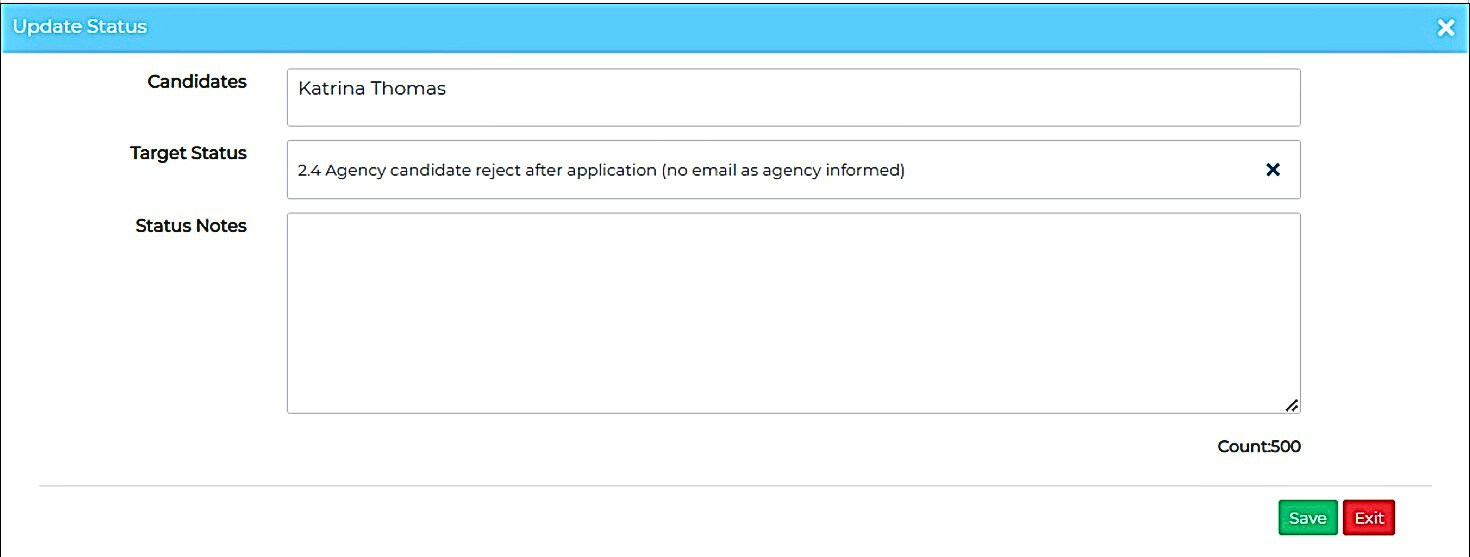
10. Reject After Application: From the candidate record
- Click on the candidate’s name from the Candidate List.
- Select the status and then select the appropriate new status from the drop-down menu.

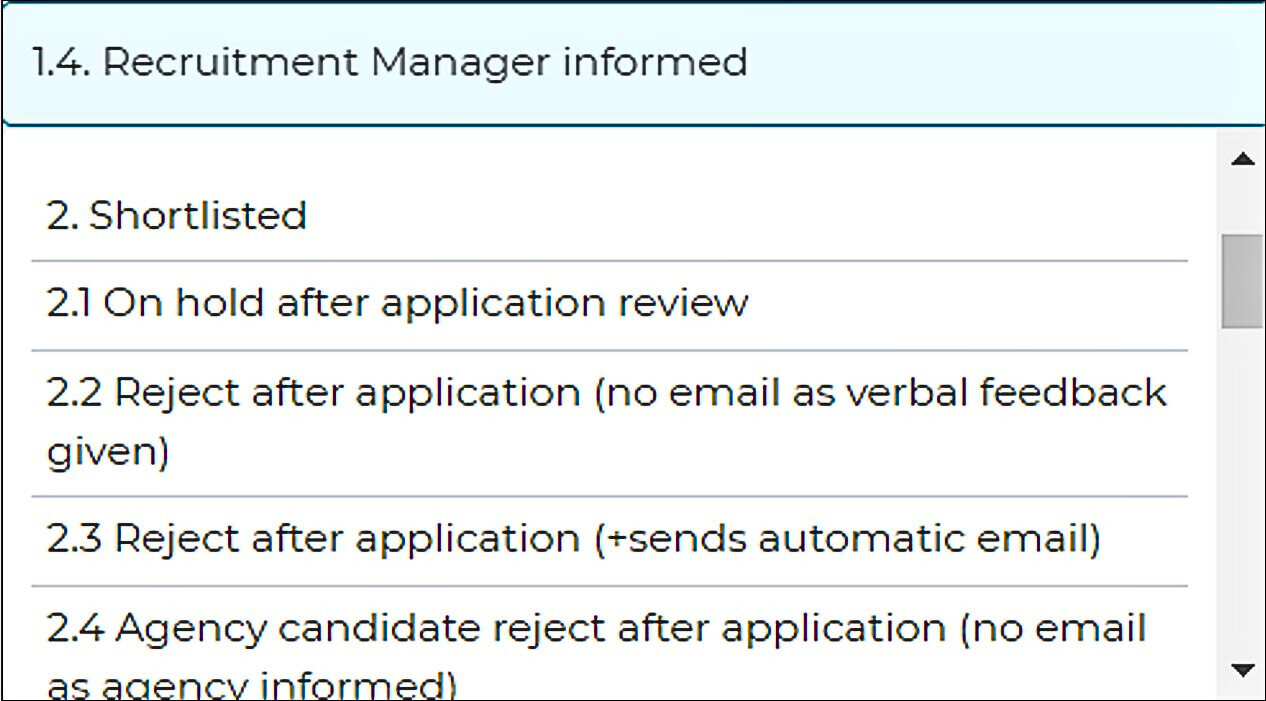
- The Update Status box will appear.
Reject after application (no email as verbal feedback is given)
- We recommend the Reject after application (no email as verbal feedback is given) status is used for internal candidates and is only updated once they have received their feedback.
- You can add status change notes here. Please see the Status Change Notes accordion above.
Reject after application (sends automatic email)
- For a Reject after application (sends automatic email) status, you can add status change notes to the candidate record, then click Next to preview the email. You can amend the email at this stage.
- Press Send to change the status and send the email.
Agency candidate reject after application (no email as agency informed)
- For Agency candidate reject after application (no email as agency informed), you can add status change notes to the candidate record and click Save.
11. Shortlist
Shortlisting from the Candidate Listing page
- Tick the box next to the candidate(s) and click into the box Change Candidate Status to and select the Shortlisted status from the list.
- Once Shortlisted is selected the Update Status box will appear.
- Click Save. The status will now change to the new status Shortlisted.
- You are now ready to invite your successful candidates for an interview. See the interview user guides for information on inviting a candidate to an interview.
Shortlisting from the candidate record
- Click on the candidate’s name from the Candidate List.
- Select the status and then select the Shortlisted status from the dropdown menu.
- Once selected the Update Status box will appear.
- Click Save.
- The status will now change from Recruitment Manager Informed to the new status Shortlisted.
- You will continue to do this until you have changed the statuses for all candidates. You are now ready to invite your successful candidates for an interview.
Selecting multiple candidates
- You can click on multiple candidates and change the status for all those selected, making this a
- quick way to update candidates’ statuses. You can only do this one page at a time, however.
In your Candidate List
- Click on the box next to App Date, this will select all the candidates on that page. Deselect any individual candidates by unticking their boxes.
- Click Change Candidate Status to and select the required status.
- A new window will appear, showing you have selected multiple candidates.
- Click Save.
- If your candidate list is on more than one page, you must go to the second page and follow the same process to select those candidates, until you have selected all the candidate statuses you wish to change.
Create "candidate packs"
Candidate packs collate all the information and documents about selected candidate(s) and forwards this by email. This can be used to review applications, shortlist or prepare for interviews. You can email the pack just to yourself or send it from Jobtrain directly to all panel members.
1. Selecting the candidate/s for the pack: Part 1
- Search for the vacancy and click into the Job Title.
- From the list of candidates, select the candidate/s whose pack you wish to create and send.
- On the left-hand side of the page – click Communicate and then Candidate Pack.
Top tip: You can send the candidate packs to yourself and then distribute to panel members. This way you could password protect the documents or save in a shared folder.

2. Selecting the candidate/s for the pack: Part 2
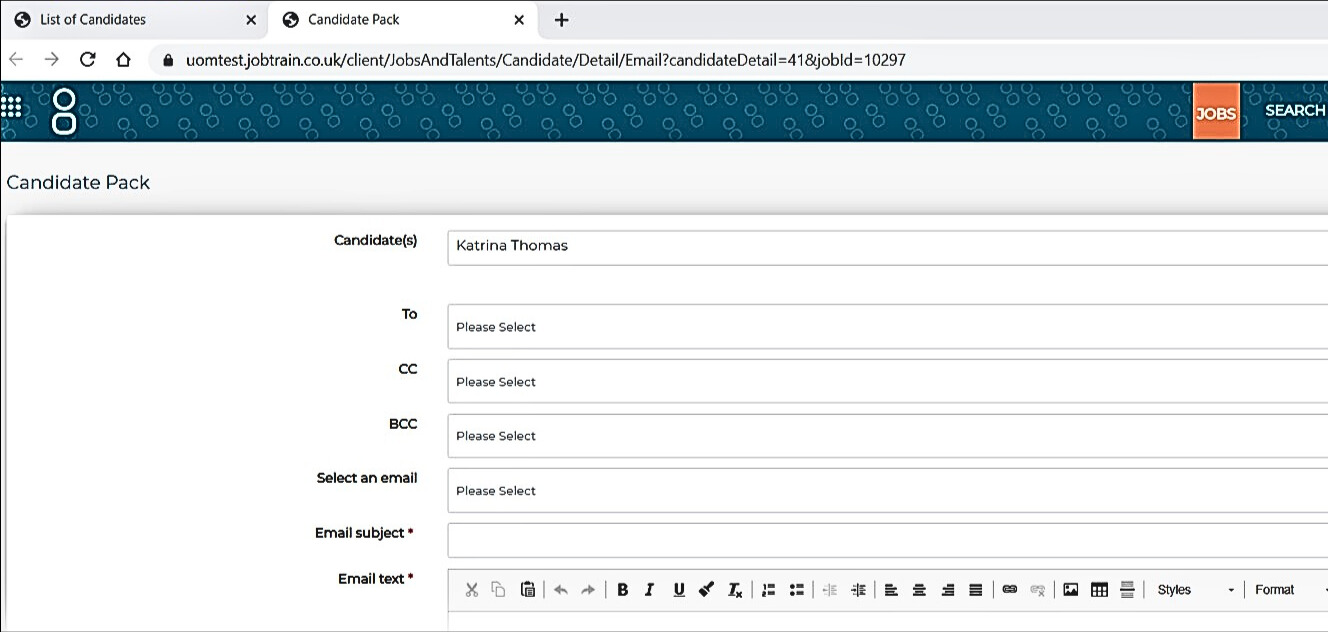
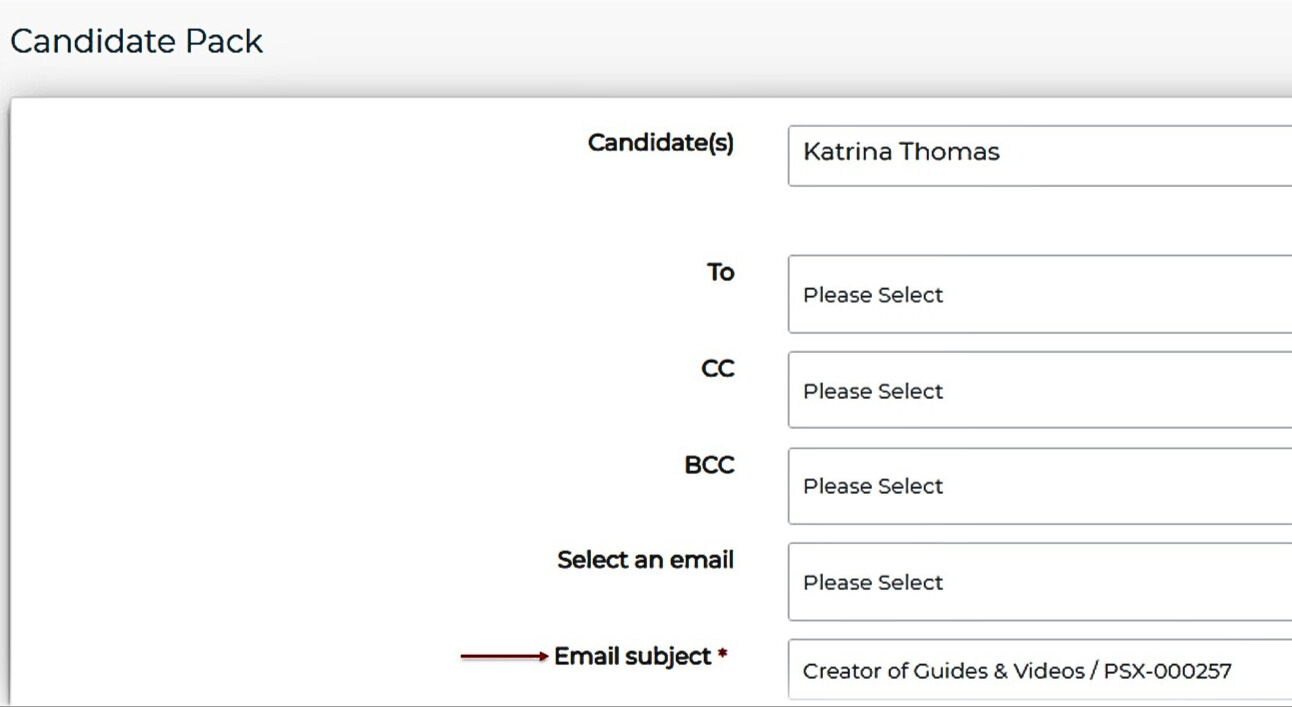
- You will be asked to select the people you wish to send the pack to including yourself.
- In the To field, type in the first name and click on the name in drop down menu. The first name will now appear in the To field.
- To add another name, highlight the first name and overtype the second person’s name. Once it appears in the drop-down menu click on the name.
- Continue until you have selected everyone you wish to send the packs to.

3. Email subject
- Select an Email: Leave this blank.
- Email subject: Add an email subject such as '[Job title] & [vacancy reference]'.
- Selecting Communicate and Candidate Pack opens two tabs, Candidate Pack and List of Candidates. Select the List of Candidates tab.
- Highlight and copy the Job Title and Job Reference Number, then paste this into the Email Subject on the Candidate Pack tab.
- Use the Email Text field to write an email to the recipients advising them on the content you are sending.
4. Application details
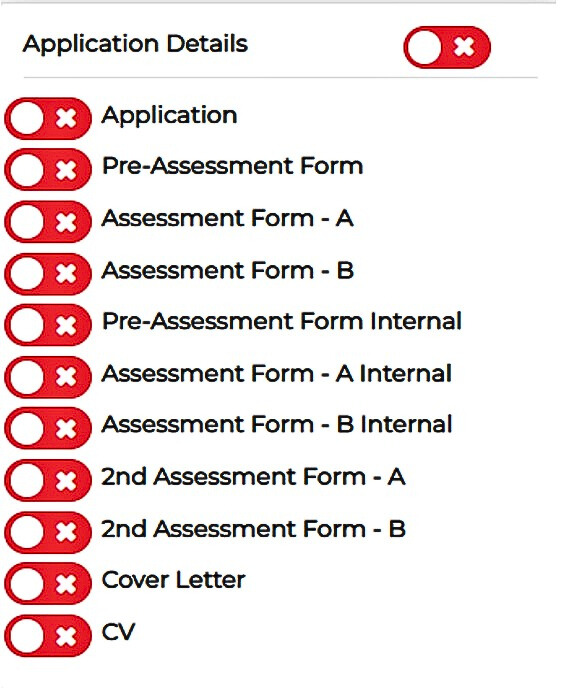
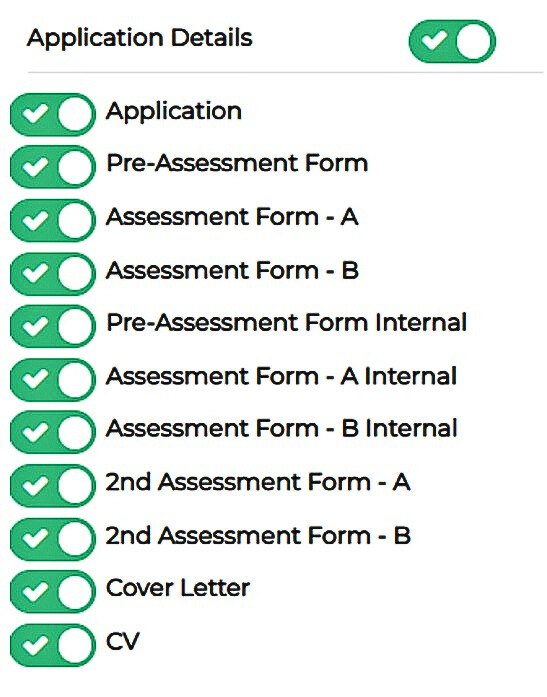
- Select only the Application Details section and toggle all from red to green.
Please note: Only the forms the candidate has completed in Jobtrain will be emailed. Selecting all to green in Application Details is the quickest way to ensure all forms each candidate has completed are included in the candidate pack.
- Press Send. One email with all the completed forms will be received per candidate.

Keeping information secure
To ensure candidate information stays secure and confidential, if you are circulating a pack by email we suggest you password protect it first. Or you can use Jobtrain to send the packs direct to panel members.
