
Getting Started with Collaborate
You can either expand each of the sections below for instructions with screenshots or scroll down to the Step by Step Guide video.
Adding Collaborate to your Blackboard Course
In an open course on Blackboard, with Edit Mode on, do the following:
- Click the Add Menu Item button.
- Select Tool Link.
- Give the Tool Link a Name.
- Select Blackboard Collaborate Ultra.
- Make sure Available to Users is checked.

Clicking on this link will take you to the Collaborate tool, where you’ll be able to create sessions and access past recordings.
Creating a Session
You can create a session/multiple sessions in your Collaborate course area by clicking on the Create Session button.

This will bring up a side menu with options for setting up your session. From here you need to:
1. Give your Session a name.
2. Add the start and end date for your session (unless you are creating an open session).
3. Decide if you want an open session or a repeat session.
An open session will never end and therefore the room will always be available to students (i.e. when there is no live session taking place).
Repeat sessions create recurring instances of the session, so students will only be able to enter the session at the times set (including early entry time).
4. Click Create.

Allowing Guests to Access Sessions
Anyone who is enrolled on your course in Blackboard will automatically have access to your session. However, if you want anyone outside of your Blackboard course to attend you can create a guest link.
To do this:
1. Open the Event Details panel by clicking on the session in the Blackboard Collaborate area.
2. Check Guest access.
3. Select the Guest role.
4. Save the session.

Once the session has been saved a guest link will automatically be created. Click on the copy button to the right to copy the link so you that you can send it to them via email.

Public Access to Recordings
You can allow guests to view your recordings by allowing public access. To do this:
1. Click on the menu button in the Collaborate area.
2. Select Recordings.

3. Clicking on the Recording Options icon (three dots in a circle).
4. Select Recording settings.

5. Make sure the recording has a sensible name.
6. Check Allow public access.
7. Save.

8. Return to the Recordings Options menu.
9. Click Copy link.

This will then automatically copy a link to the recording to your clipboard so you can send it to anyone via email.
Starting and Ending a Session
Starting a Session
1. Click on the session in your Collaborate course area.
2. Click Join session in the session side menu.

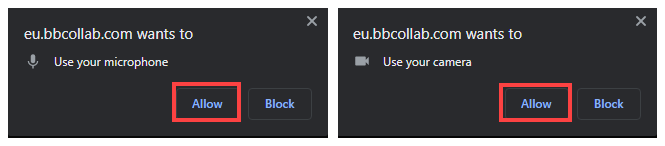
If this is your first time using Collaborate, your browser may prompt you to give permissions to your microphone and camera. Click Allow to ensure you can use these in your sessions.
You may also be asked to test your audio and video. Ensure you can hear and see yourself, and if everything is correct click Yes.

During the Session
You’ll see a blank screen and the following controls when you first open the session.

a) My Status and Settings - here you will be able to update your status, leave the session and give pre-provided feedback (such as Happy, Surprised, Go Faster etc…).
b) Share Audio - this is where you switch your microphone on/off. When you enter the session your microphone will be turned off, so you need to switch this on so students can hear you.
c) Share Video - this is where you switch your camera on/off. When you enter the session, your camera will be turned off. If you wish for students to see you, switch this on here.
d) Raise Hand - Here you can put your hand up in a meeting, for example, to get attention or to ask a question.
You'll find a link to open the Collaborate Panel at the bottom right of your screen (lilac menu). Opening this will allow you to access the following:

a) Chat – here you can access chat with the whole group, and a moderators only channel.
b) Attendees - here you can see who has joined the session and who is attempting to join the session.
c) Share Content – here you can share various media within the session. Further details on this can be found below.
d) Settings – here you can find technical settings for the session.
Leaving a Session
1. Click on the Session Menu button in the top left of the screen.
2. Click Leave session at the bottom of the menu.

Alternatively, you can close the tab or browser you’re working in to end a session.
Sharing Content
To share your screen, a PowerPoint presentation or any other files:
1. Open the Collaborate Panel Menu in the bottom right of the screen.
2. Click on the Sharing button.
3. Click Share Application/Screen.

You’ll then be prompted to choose what you want to share. Your options are as follows:
- Your Entire Screen – students will be able to see everything that happens on your screen. This is a good option if you are using multiple applications to demonstrate something.
- Application Window – this will only share the view of one open application (e.g. PowerPoint). This is a useful option if you are giving a lecture where you talk through a set of slides.
- Chrome Tab – this will only share the view of one open tab in your browser. This option is useful if you wanted to talk through a web page or show a video from a site like Youtube (in this instance also make sure you have Share audio selected).

To stop sharing click on either:
a) The stop button at the top right of the screen.
b) the stop button in the Share Content menu.
c) the stop button at the bottom centre of your screen.

Managing Recordings
Recording a Session
To record a session:
1. Click on the Session Menu button in the top left of the screen.
2. Select the Start Recording option.

Ending a Recording
To end recording:
1. Click on the Session Menu button in the top left of the screen.
2. Select the Stop Recording option.

Accessing Recorded Sessions
You can access your recordings from your Collaborate course area as follows:
1. Click on the menu button in the Collaborate area.
2. Select Recordings. To play a recording select it in the list.
You can also do more with the recordings by clicking on the Recording Options icon (three dots in a circle at the end of the row) where the recording appears. This will bring up a menu with various options.

Large Event [Webinar]: 251 to 500 Attendees
By default, Collaborate sessions support up to 250 attendees. You can set up your session to support up to 500 attendees. When creating the session in Blackboard, select Allow 250+ attendees to join before the session begins.

If you don't see the large session option, check the session length. The session needs an end time and can't be more than 4 hours in length.
The session name must contain only alphanumeric characters.
This option makes the session a webinar that supports up to 500 attendees. Not all features are available in webinar mode.
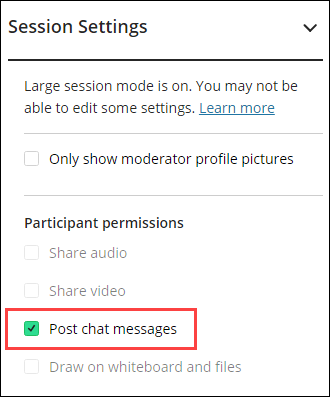
- Large Events will have chat, whiteboard editing, webcam and microphone sharing disabled upon entry for Participants.
Participant chat can be enabled during the session by a Moderator via My Settings > Session Settings.
- Breakout Groups are also unavailable for Large Events.
What if I want to let Participants chat or use their audio?
If you want a single Participant to share audio or video, post chat messages, or draw on whiteboards and files during the session, promote the Participant to Presenter via the Attendees tab during the session.
See more on How to Promote Attendees on the Manage Attendees page.

Breakout Groups
To facilitate small group collaboration, you can create breakout groups that are separate from the main room and assign participants to them. Learn more about Breakout Groups in the Collaborate FAQs